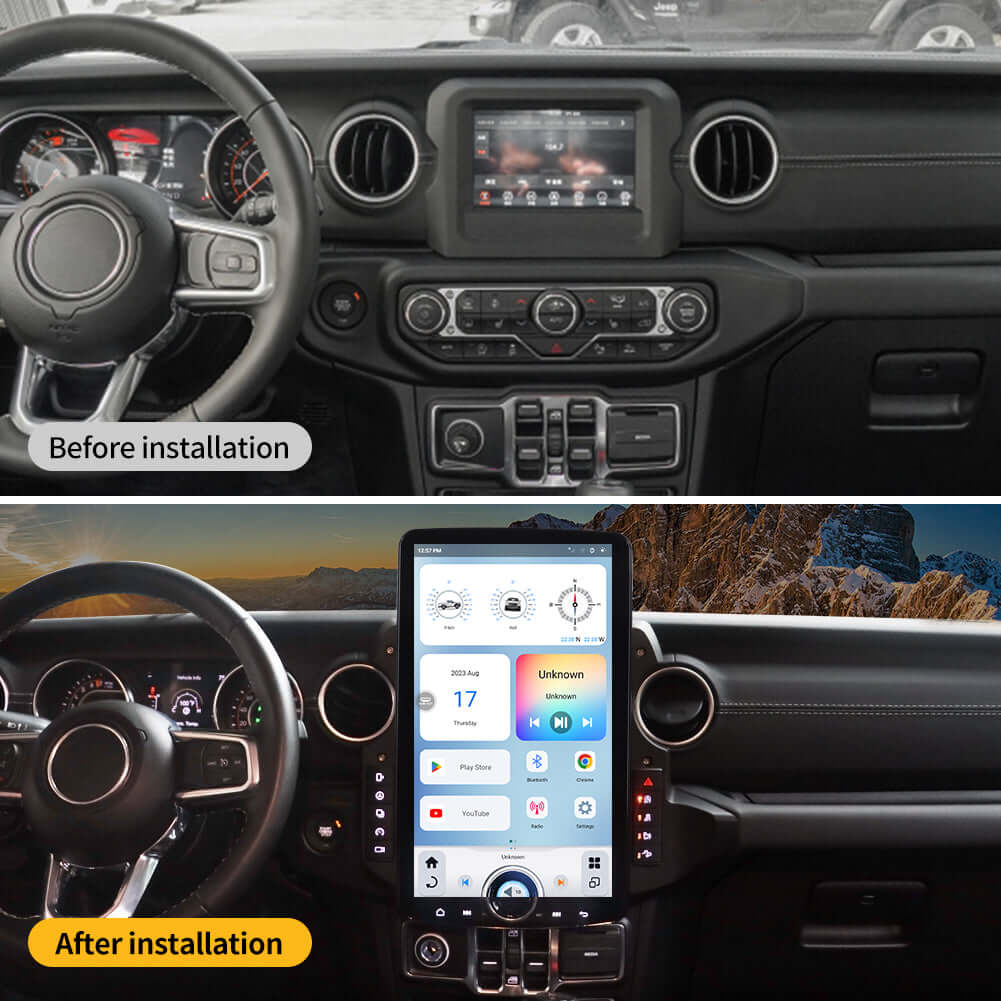
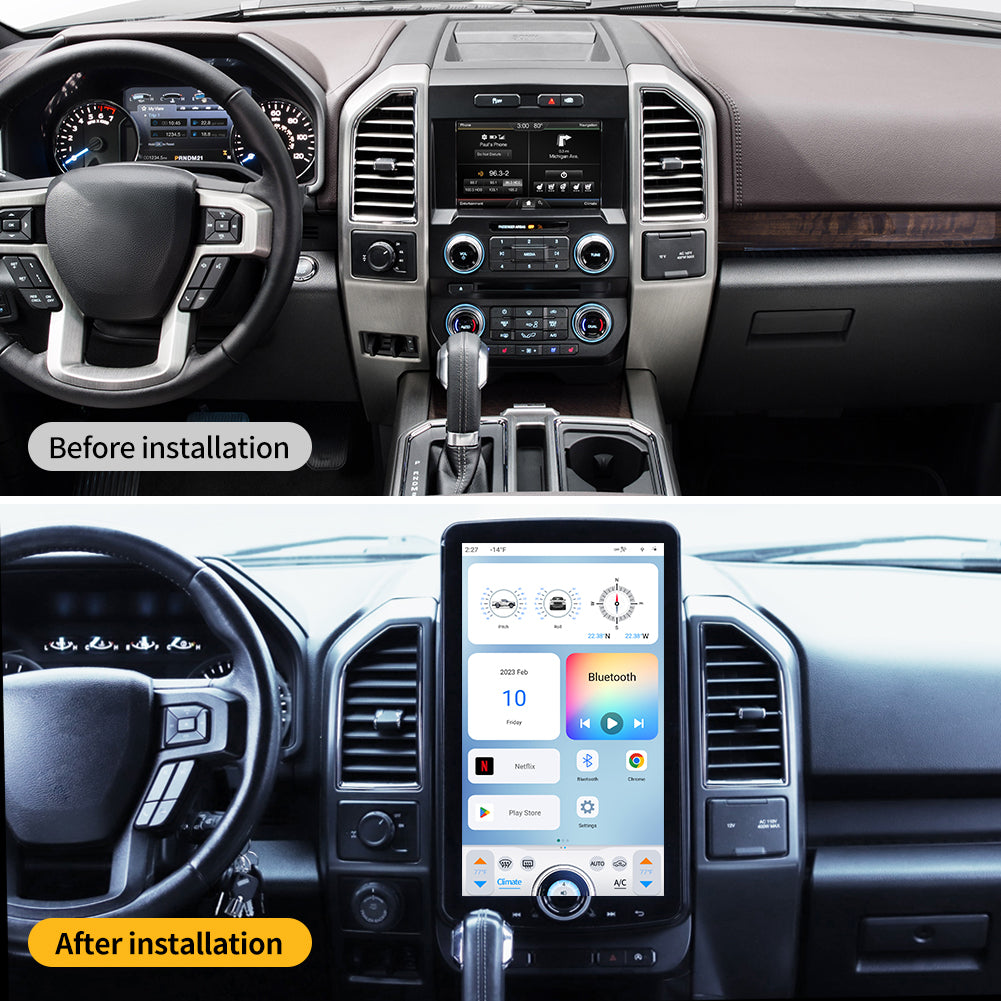
The Installation Process
While installing an aftermarket head unit might sound complicated, the XL "T" Style Radio is designed to be a straightforward replacement for the factory radio. Here’s an overview of the process:
Tools and Materials Needed:
- Basic tools like screwdrivers (Philips and flathead), plastic trim removal tools, and possibly a socket wrench for certain screws.
- Wiring harness adapter (included in most XAutoStereo kits) to ensure plug-and-play compatibility with factory wiring.
Step-by-Step Installation:
-
Preparation:
- Disconnect the negative terminal of the battery before starting the installation to avoid any electrical shorts.
- Remove the center dashboard trim around the factory head unit using plastic trim removal tools. Be careful not to scratch the surfaces or damage the clips holding the trim in place.
-
Remove the Stock Radio:
- With the trim removed, unscrew the bolts securing the factory radio to the dash (usually 7mm or 10mm bolts). Once the screws are removed, carefully pull the stock unit out.
- Disconnect all the factory wiring harnesses from the back of the radio. Depending on your model, this could include the antenna, power, data, and speaker connections.
-
Install the XAutoStereo XL "T" Radio:
- The XAutoStereo XL "T" model comes with a wiring harness adapter designed specifically for the Jeep JL/Gladiator, so connecting it is usually plug-and-play. Attach the appropriate connectors from the factory harness to the back of the new radio.
- Ensure the CAN bus adapter is properly connected. This module allows the new radio to communicate with the vehicle's computer for steering wheel controls, climate control, and other integration features.
-
Test the Unit:
- Before reassembling the dashboard, reconnect the battery and power on the XAutoStereo XL radio to ensure everything is working correctly. Test all features like the radio, backup camera, steering wheel controls, climate settings, and any custom apps.
- Make adjustments as needed, and if any connections seem off, double-check the wiring.
-
Reassemble the Dashboard:
- Once everything is tested and functioning properly, reassemble the dashboard by screwing the new radio in place and snapping the trim back on. Reconnect the battery, and you're all set!
INSTALL VIDEO (GEN5 T-STYLE):
OFF-ROAD CAMERAS:
ONX OFF-ROAD APP:
CUSTOMIZE WALLPAPER:
ADD SIM CARD:
WIRELESS CAR PLAY ON XL/GEN6:
WIRELESS ANDROID AUTO ON XL/GEN6:
DSP FEATURES ON XL/GEN6:
SPLIT SCREEN ON XL/GEN6:
WI-FI ON XL/GEN6:
CUSTOMIZE HOME PAGE ON XL/GEN6:
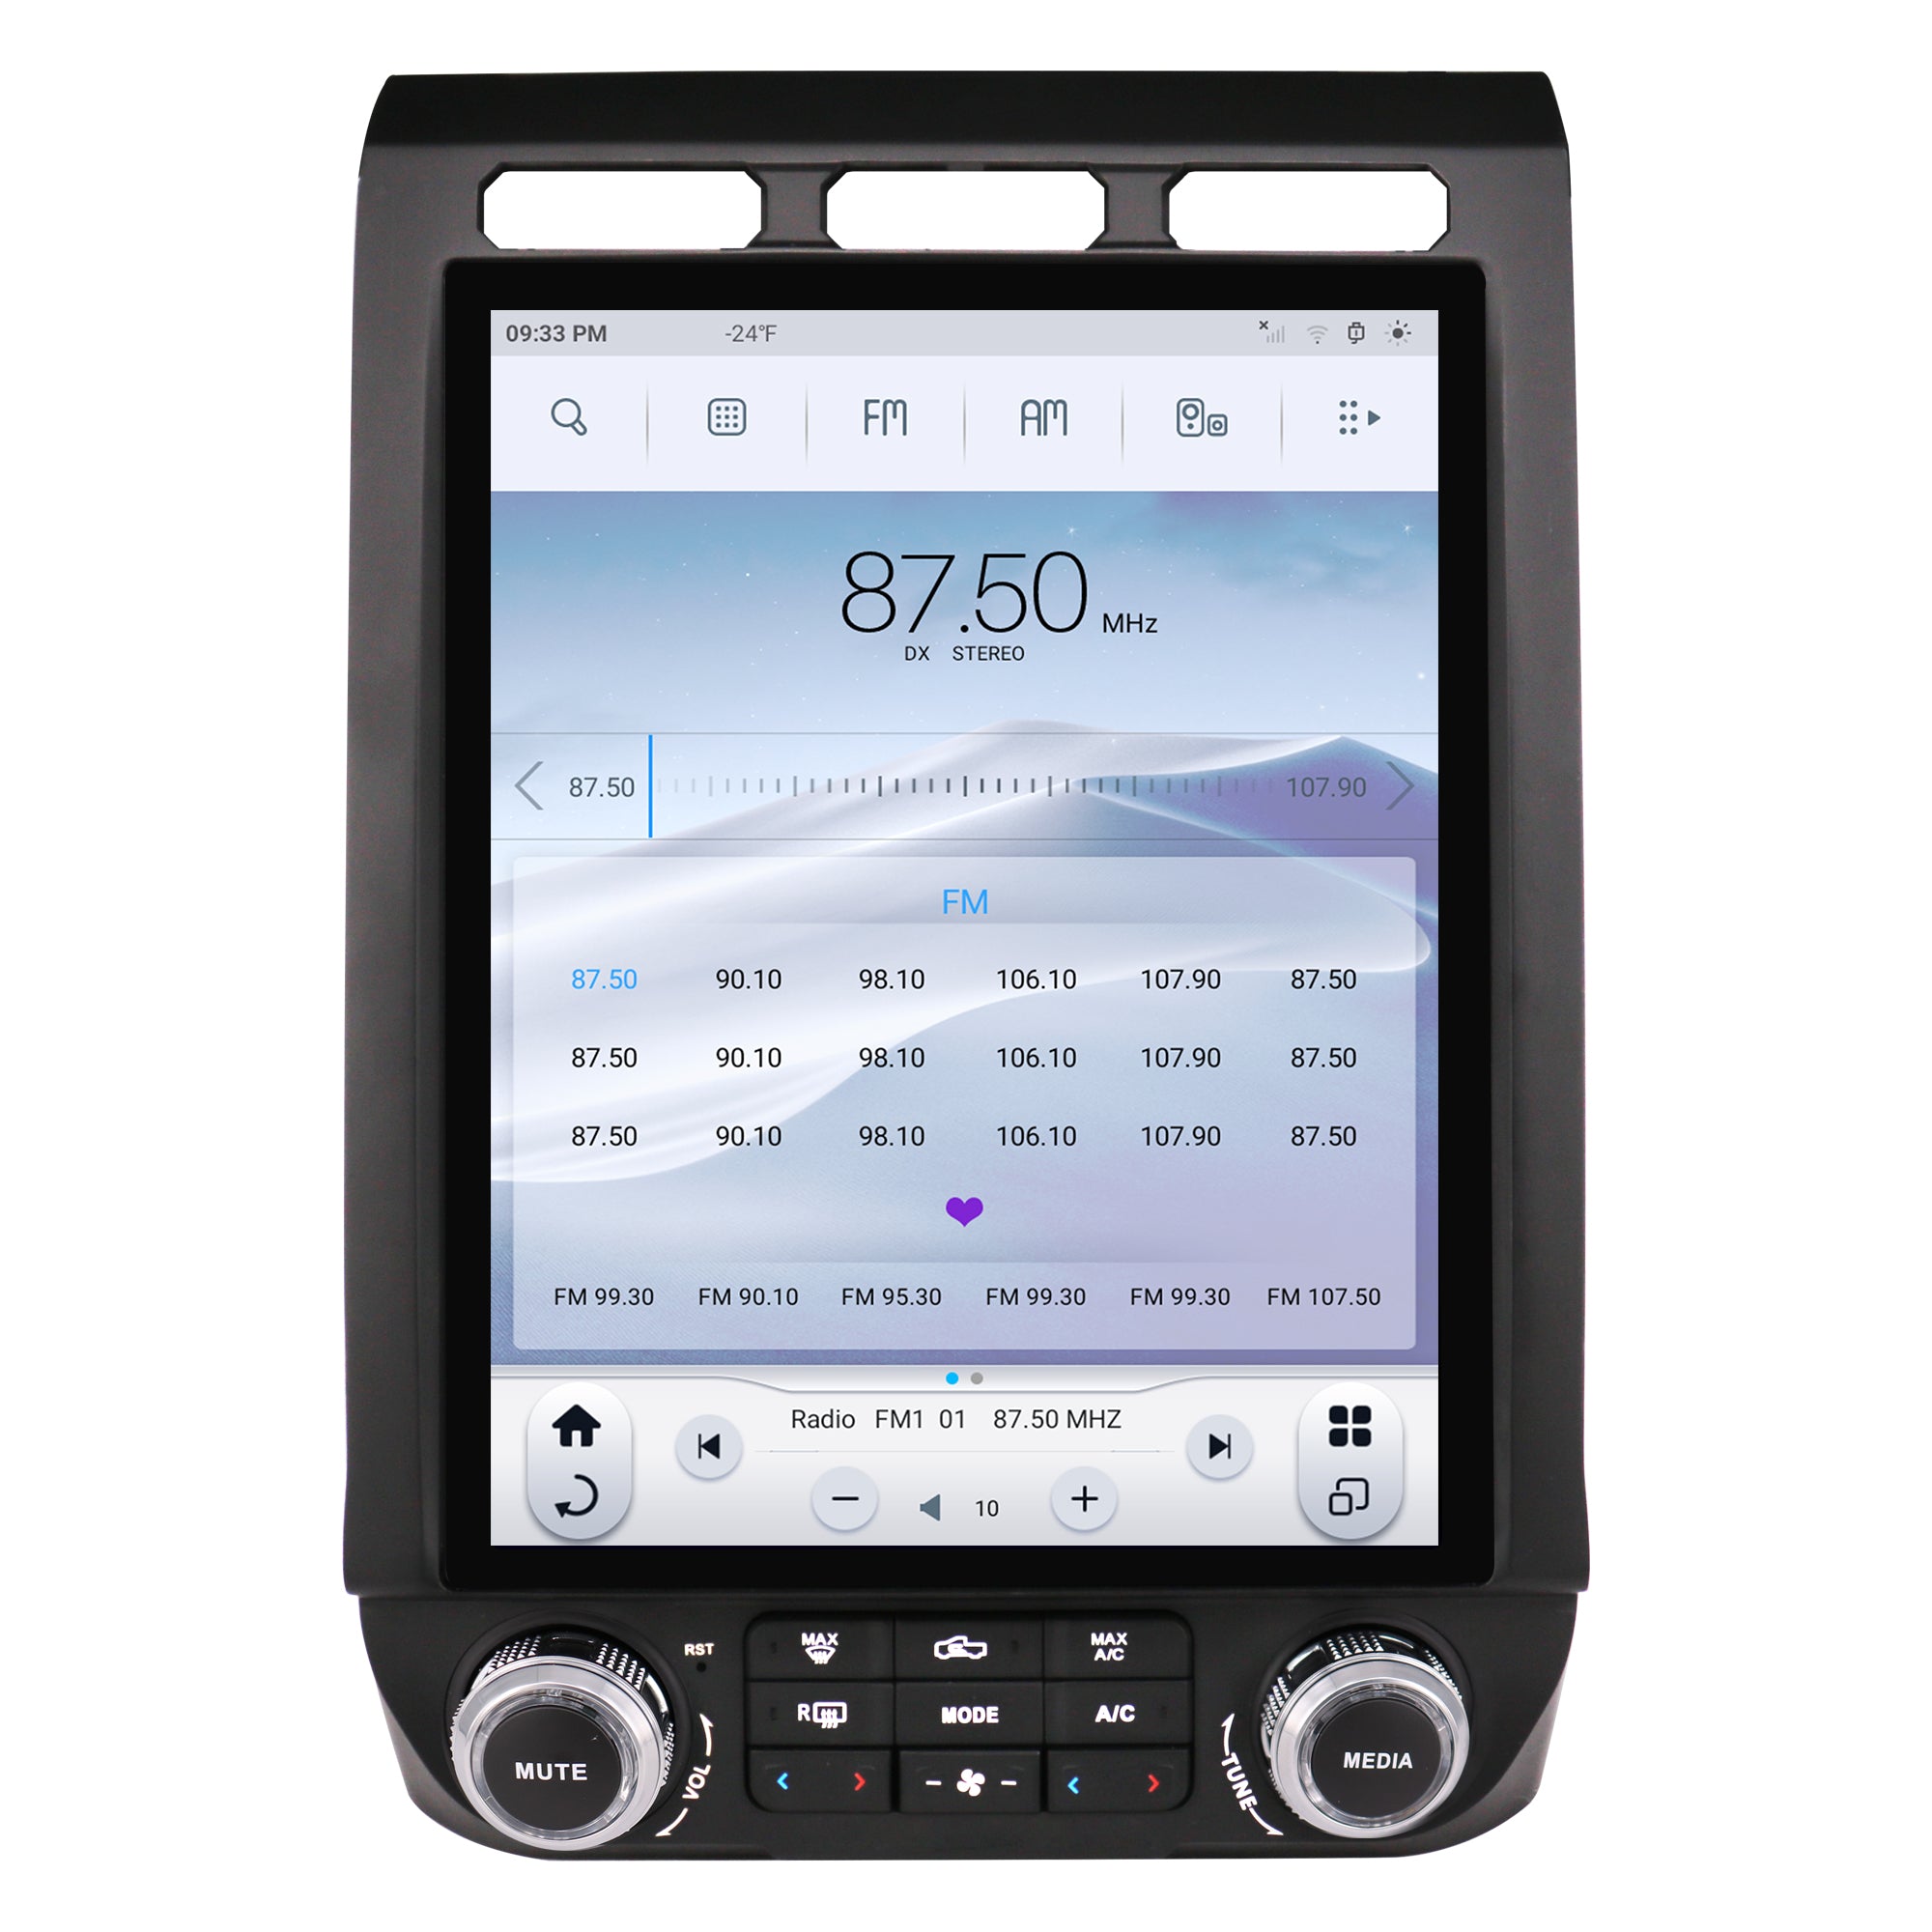
PLUG DESCRIPTION

If you're confused , you can also feel free to contact our excellent customer service team to help you solve all your concerns(Contact Us). Our car stereo adopts plug and play installation method. Each of our plug connector is labelled , easy to identify, even completely inexperienced people can easily install.
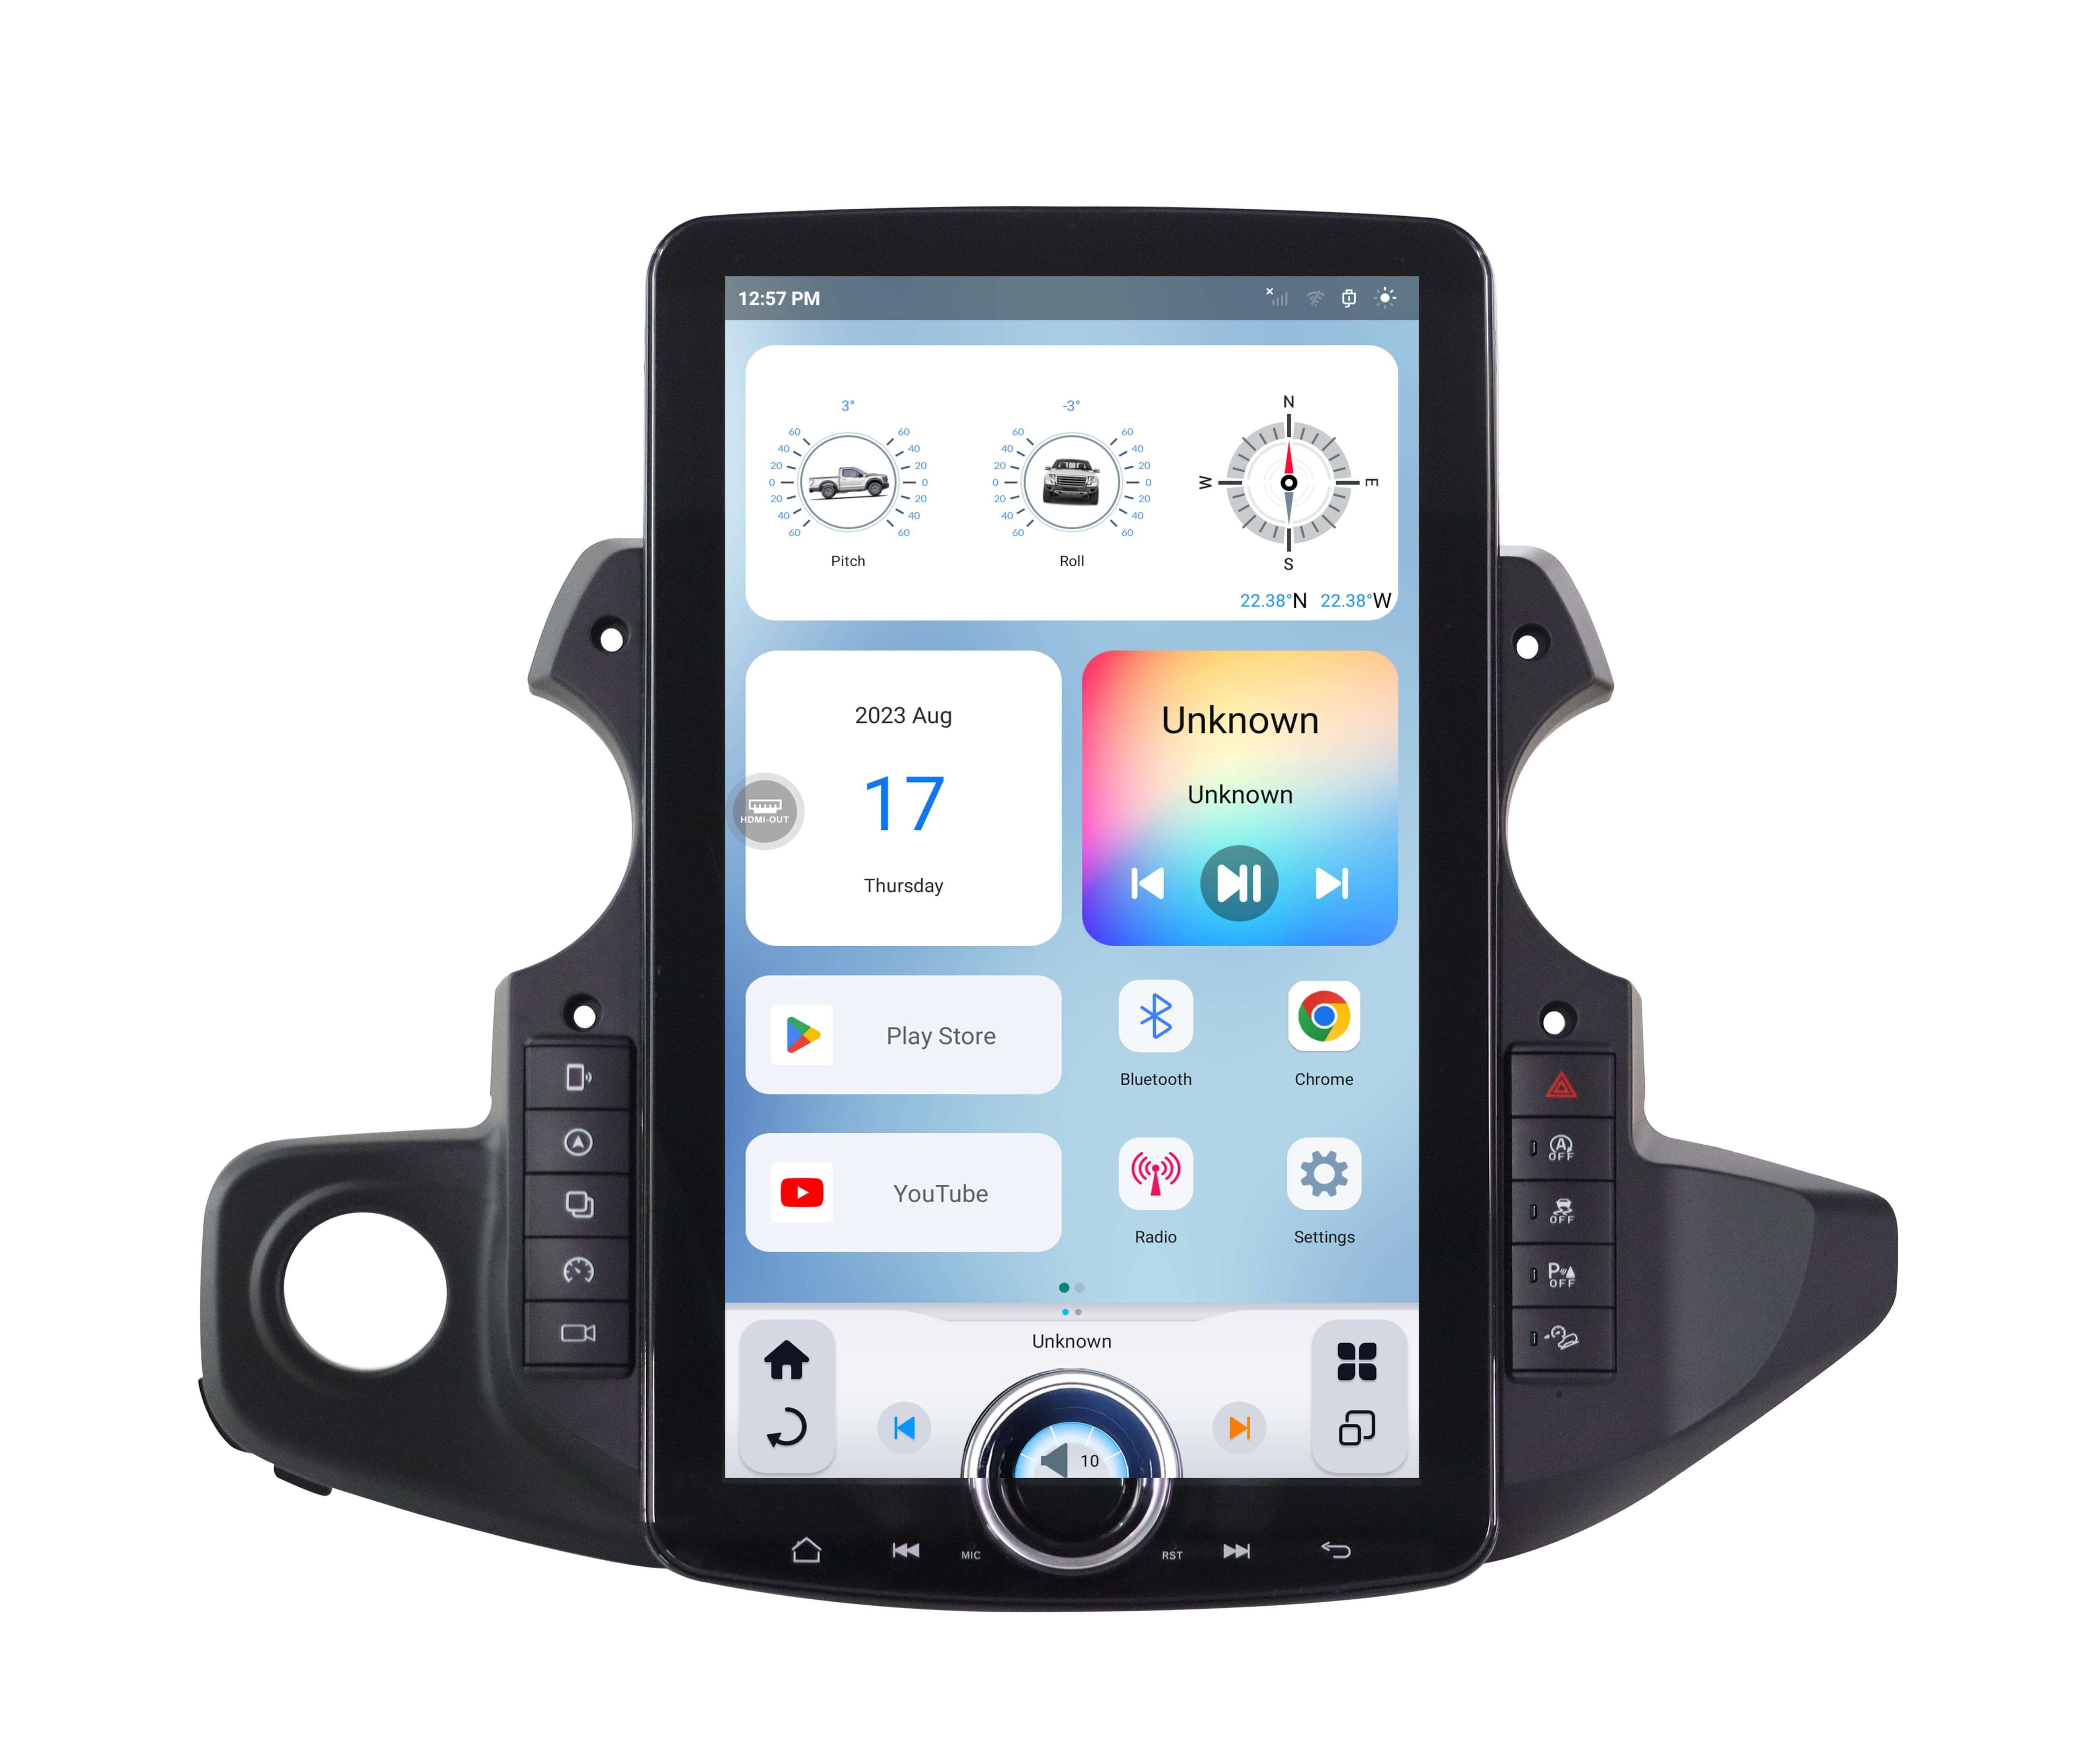
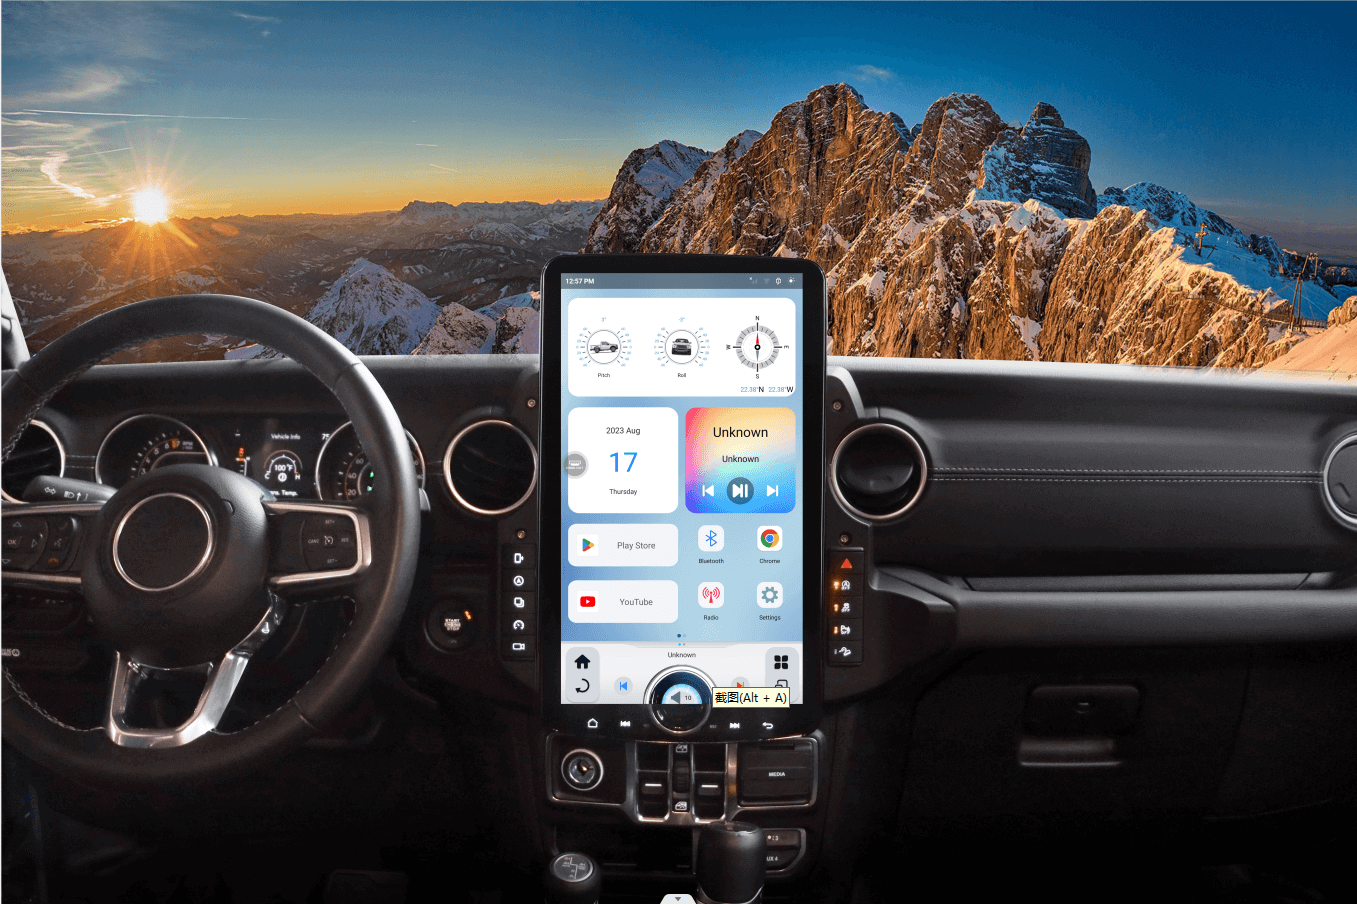
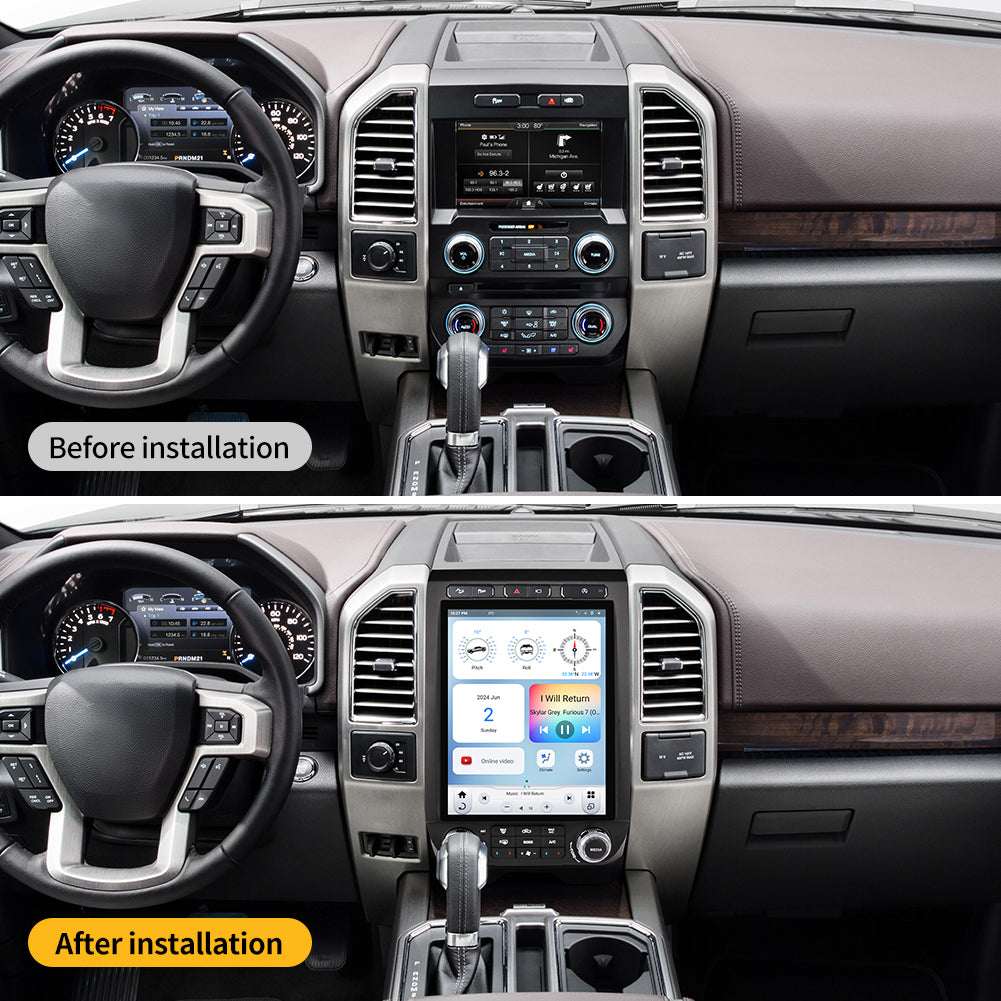
Enhancing Your Jeep Experience
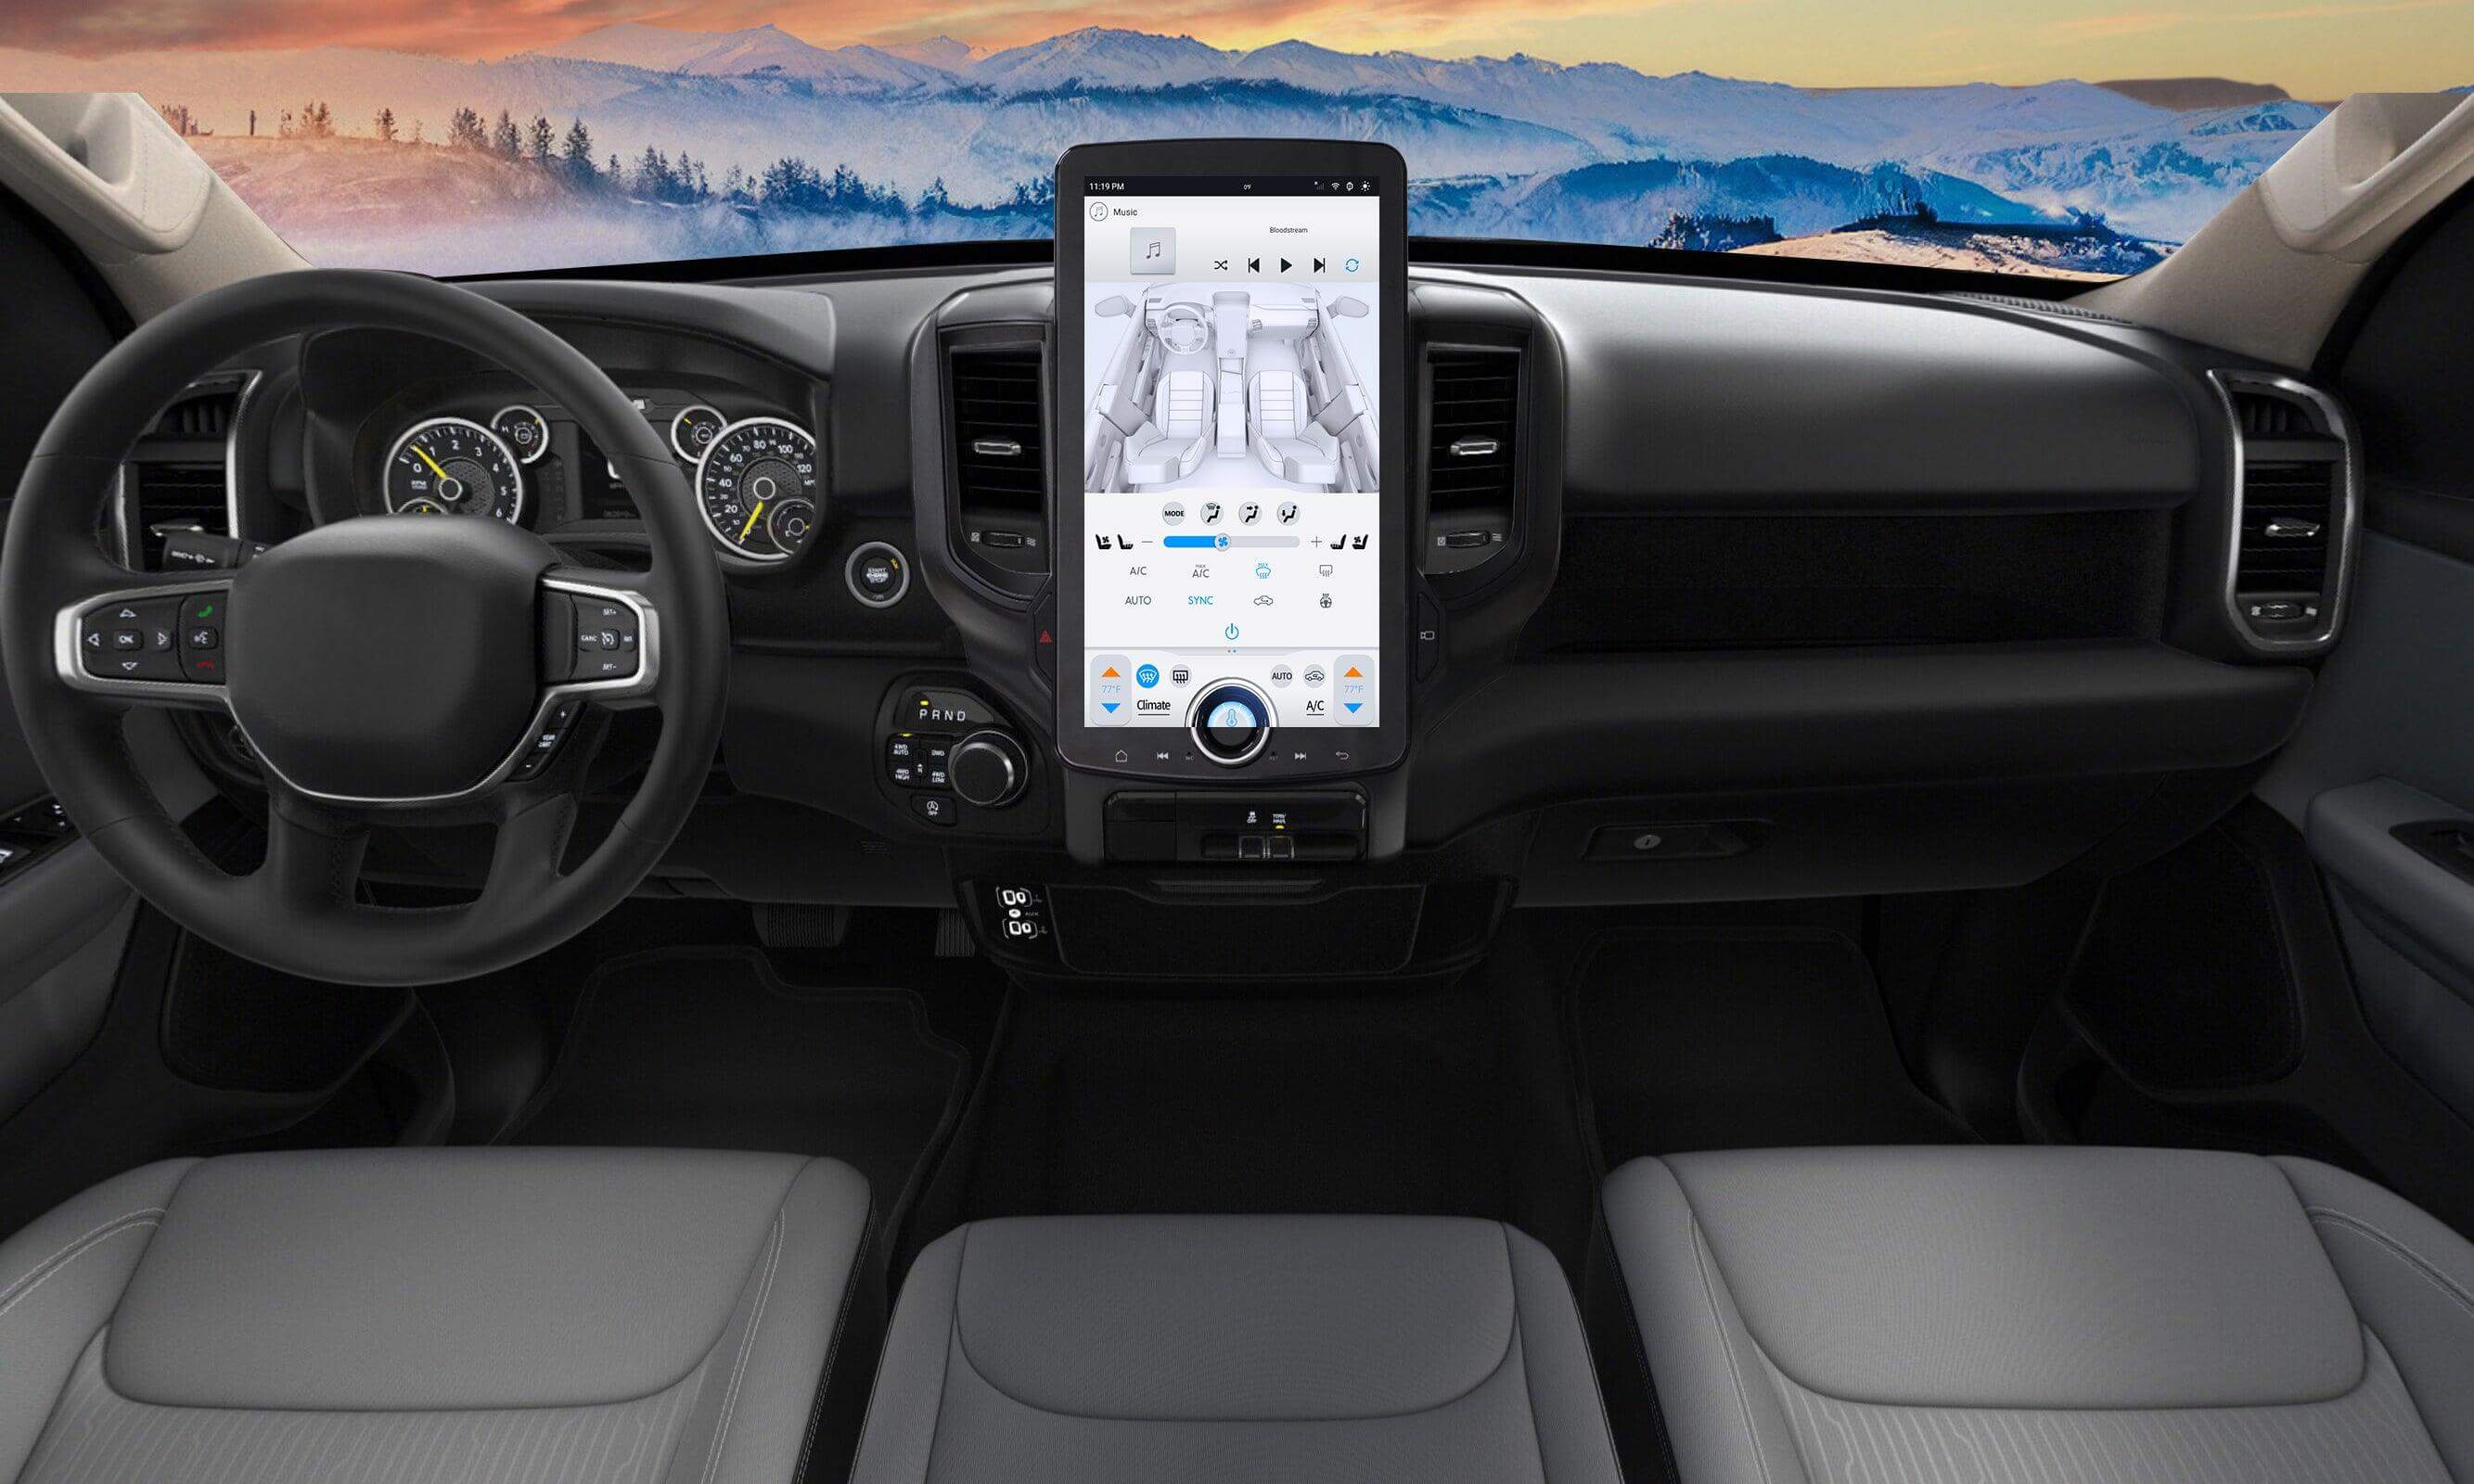
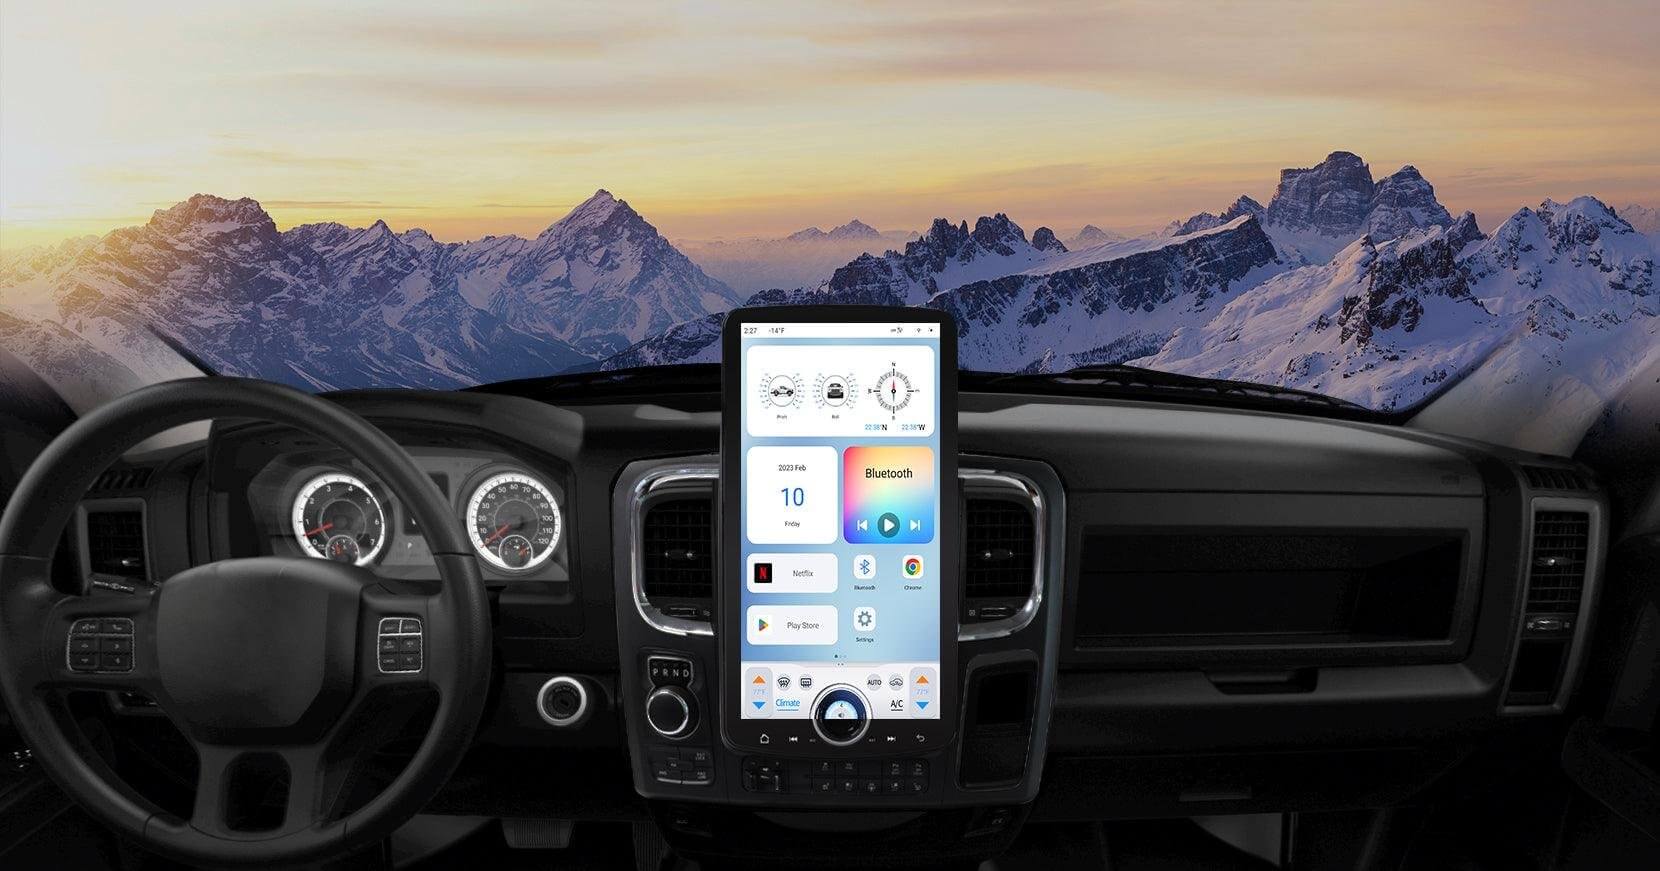
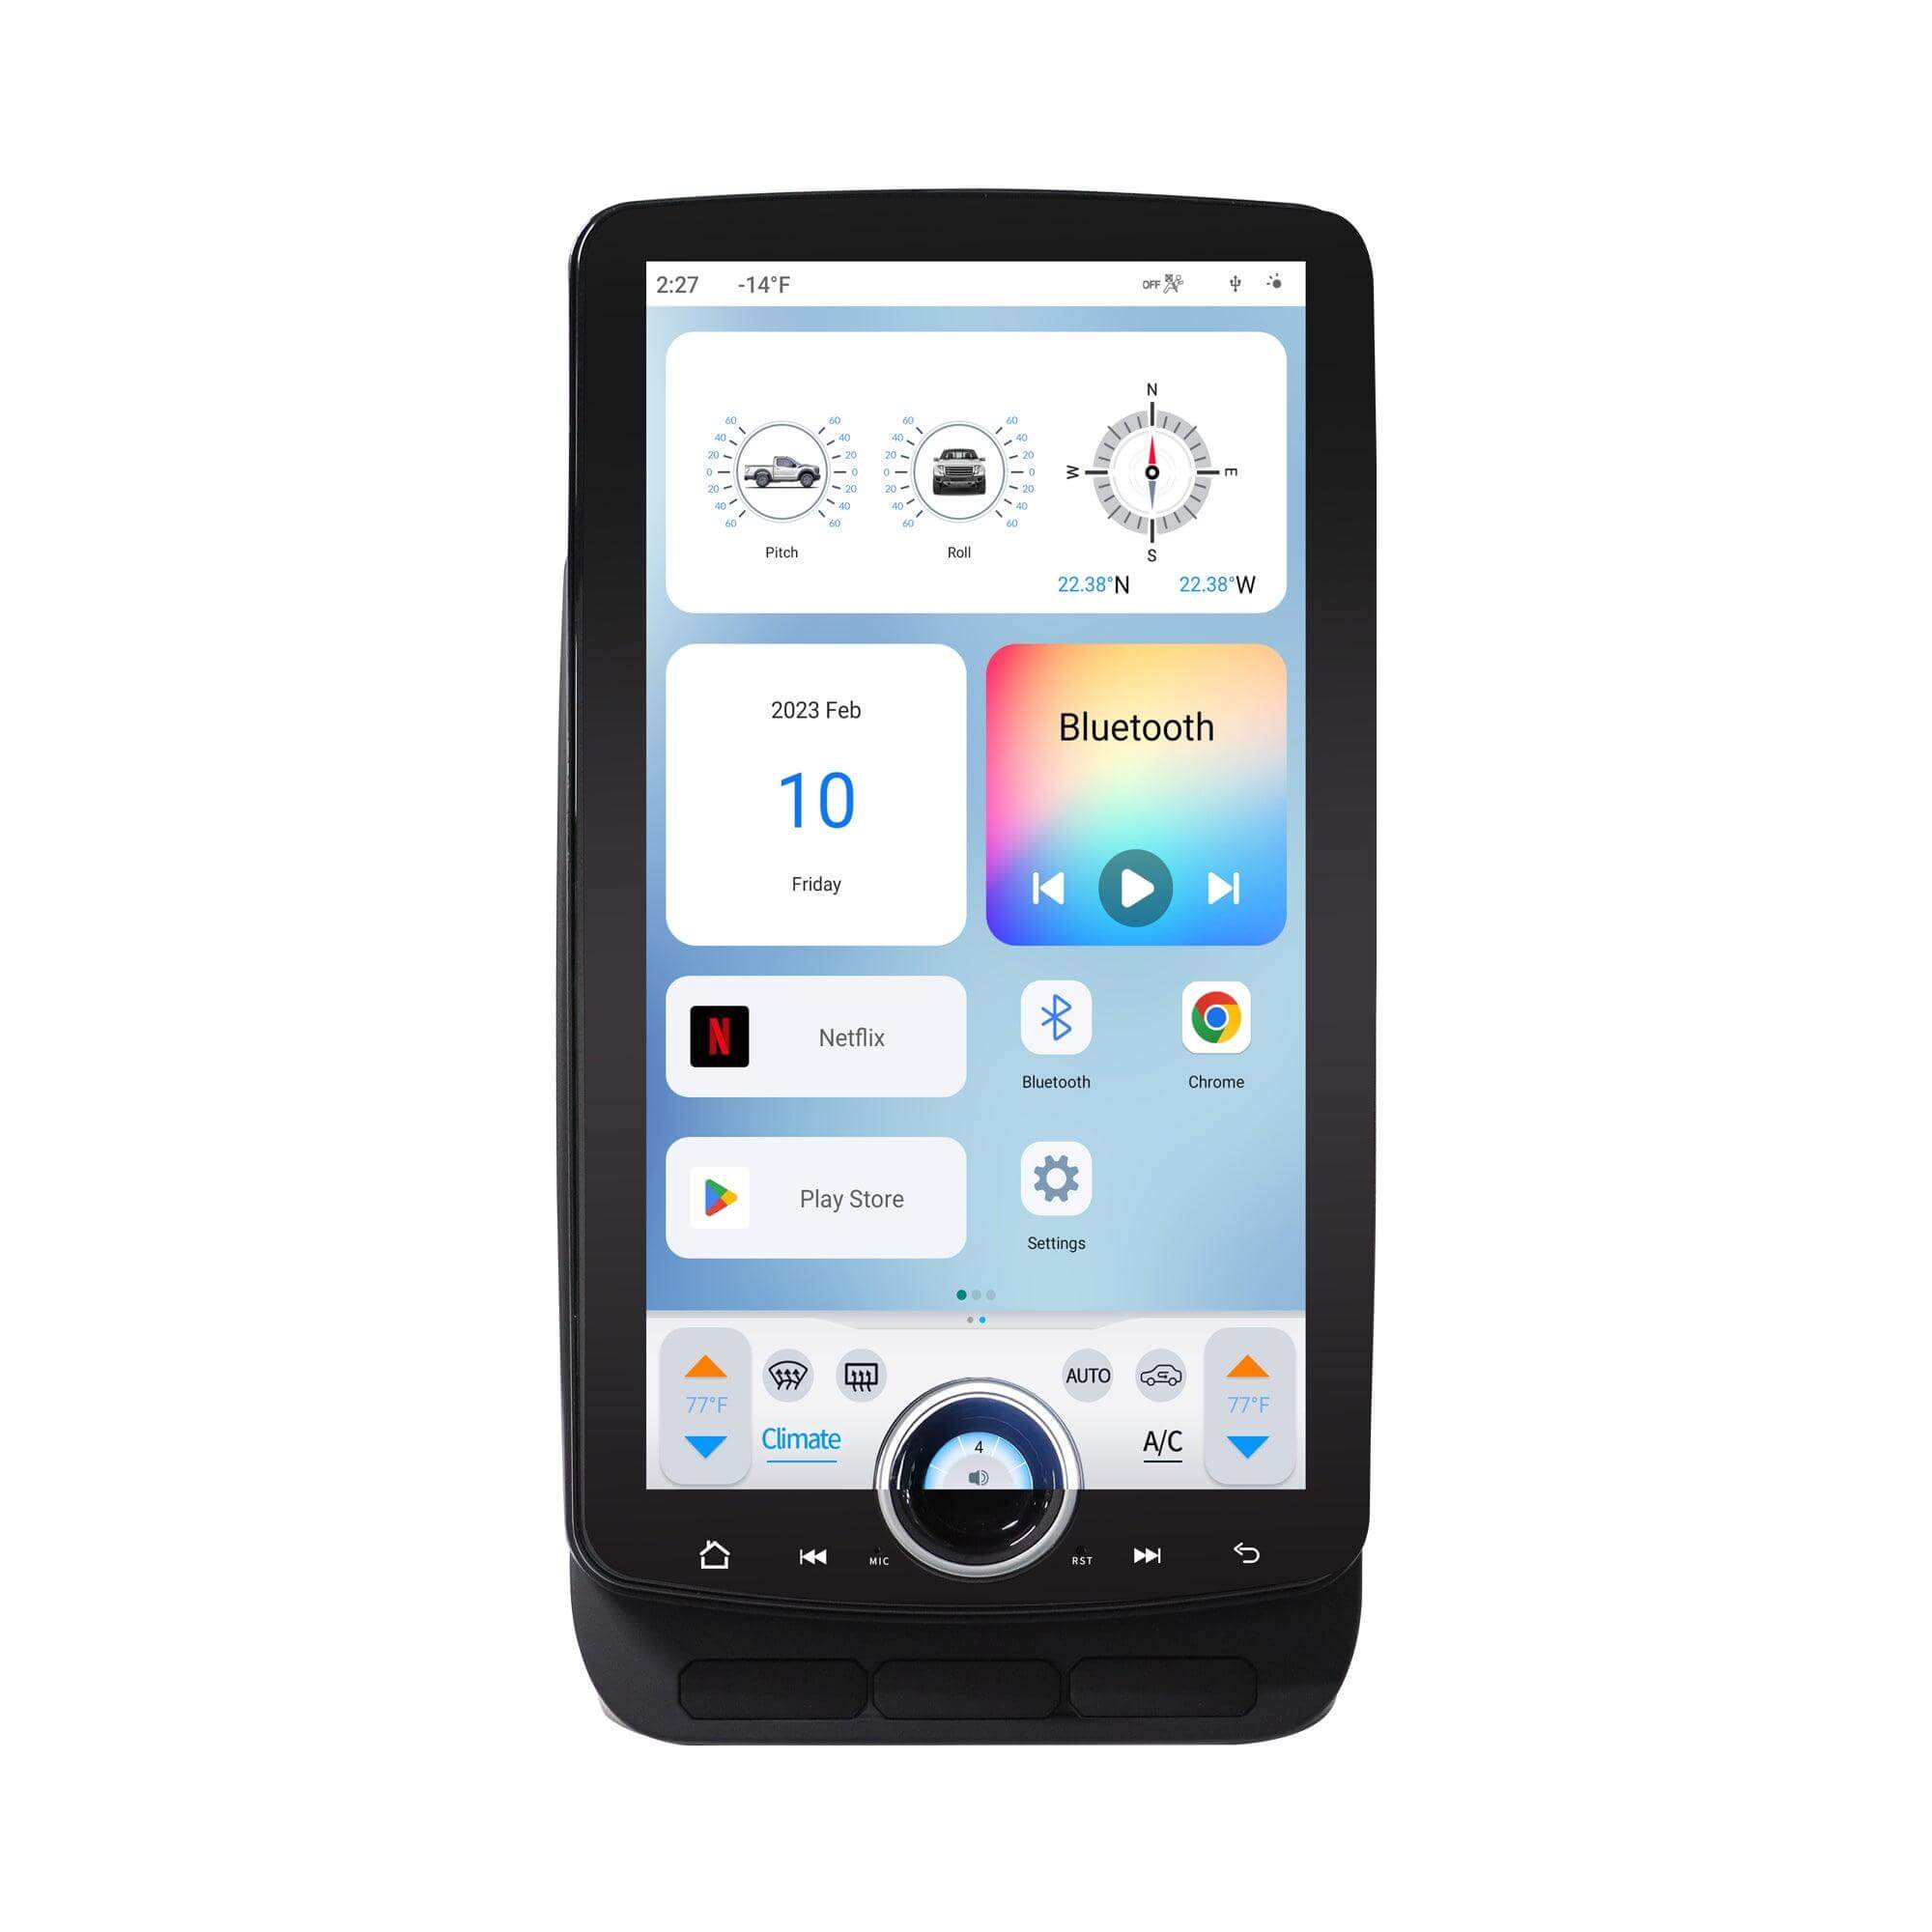
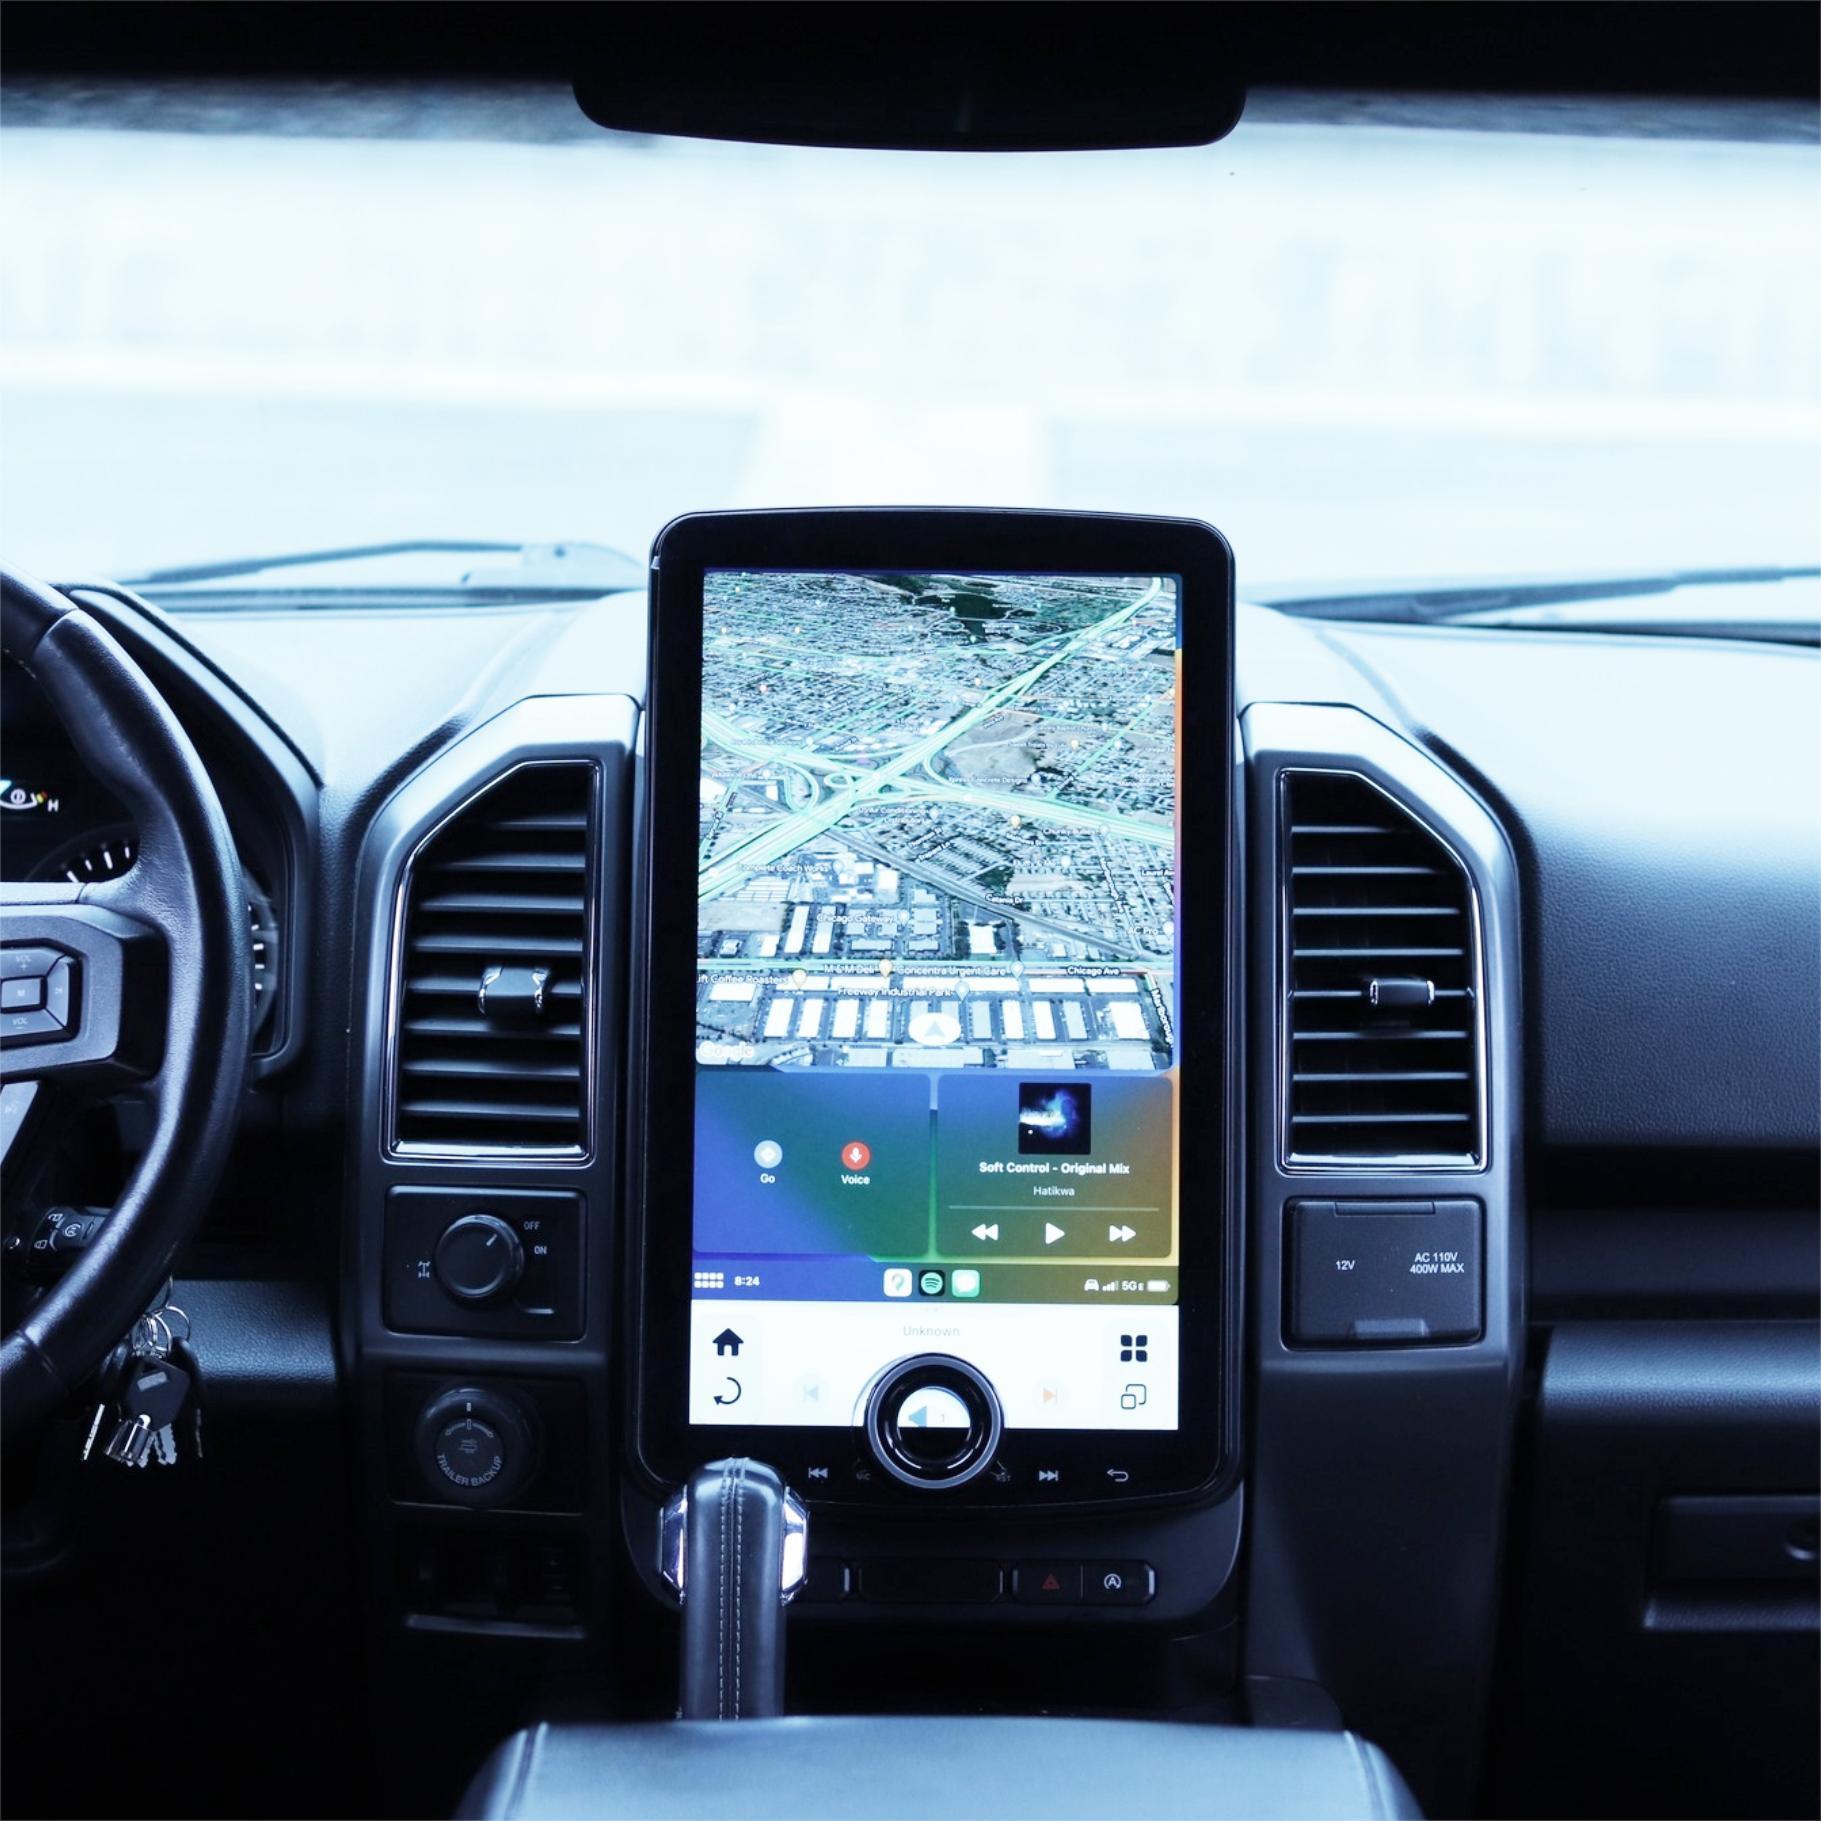
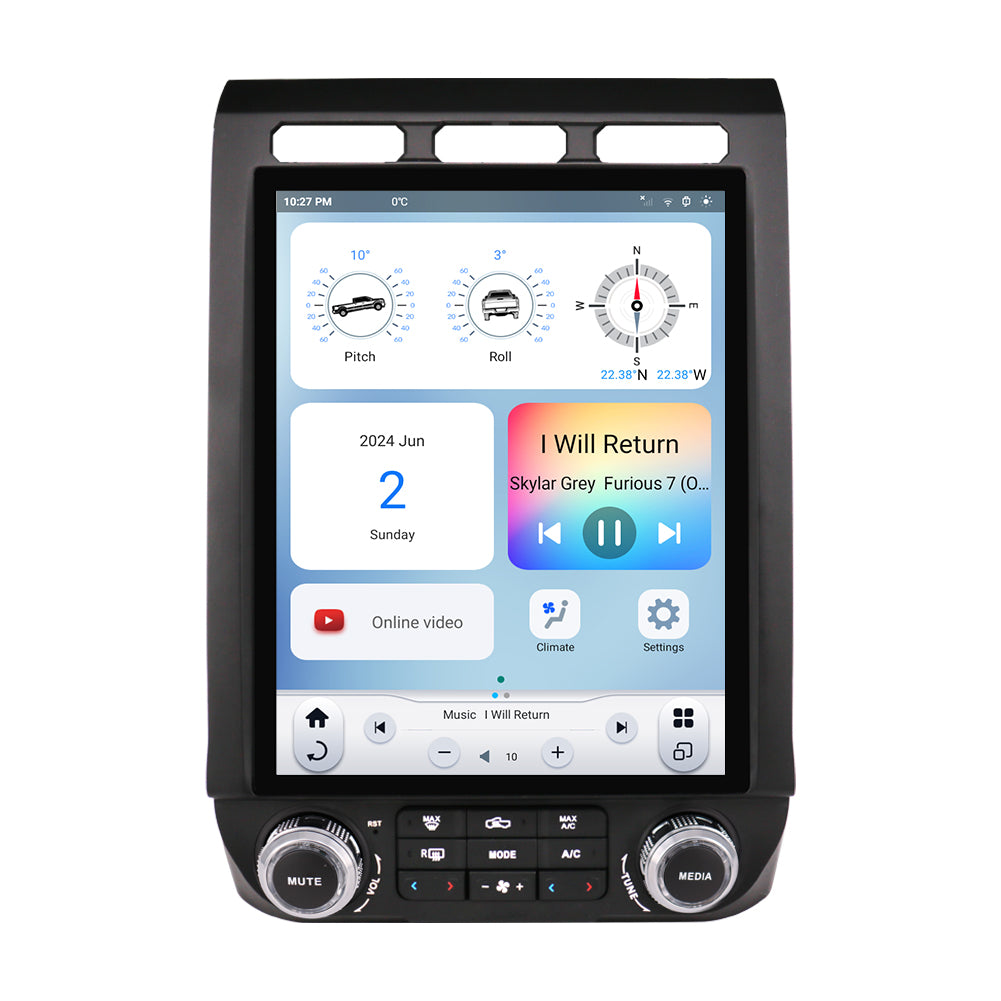
After installing this XAutoStereo XL “T” Style Radio for 2018-2021 Jeep JL/Gladiator, you'll immediately notice the difference in usability and functionality. The larger screen, intuitive controls, and added features like Apple CarPlay and Android Auto make the XAutoStereo XL "T" style a game-changer for Jeep owners. Plus, the off-road-specific features, coupled with the robust Android operating system, allow you to fully customize the infotainment experience to match your needs.
Whether you're hitting the trails or simply commuting through town, the XAutoStereo XL "T" style brings the Jeep JL and Gladiator infotainment system into the modern era, all while maintaining the rugged and practical spirit that Jeep is known for.


Share:
Upgrading the 2018-2021 Jeep JL/Gladiator with a 15.6“ XL "T" Style Radio
10 Best Car Stereos to Consider Buying in 2024